1. Start Page
[initial]

[modified]

I changed the first page because the initial one was too simple. I want to highlight the main colour of Ncup by using the colour on the background.
2. Login-Sign Up
[initial]

[modified]

I added sign up and sign in button on each sign in and sign up apge.
3. Register cup
[initial]

At first, uploading the photo was just optional, and I wanted that users can see the photo before clicking 'done' button. But I got feedback from Armando that it looks more proper on the web, not the app. So I changed the button.
[1st modified]

I changed like the photo above, like big plus button and cancel button and put 'preview' function. But I did not like it.
[final]

It is the final design. While modifying the design and function, there were some changes in function. Like it is no more optional to upload the photo of tumblers. Because I thought staff in cafe need to check the tumbler image when they scan it. And I coloured green on the top background.
[initial]


After I changed 'uploading photo' feature from optional to compulsory, and changed a means of rewards, I deleted the cup illustration. And I designed it with various type and asked people when I asked for feedback. And most voted one which is the final design.

4. Rewards


So I changed it and put circles in a line. And when users flick the green part, N-times reward will be shown.


When I made the coupon page, I divided it into available and history in order to check whether they can use it or not. It would be shown how many days left and will be shown 15days before the coupon will be expired like '15 days left' or 'd-15'.


At first, I was going to count and give rewards to each cup. The round line and the number in the circle show and give different rewards. Round line shows the circumstance of stamp reward, so it is renewed when users bring their cup 10 times. The number in the cup keeps showing the number of cup uses, and it relates to N-times reward. For the design, I gave a grey colour to the shadow under the box. And I put 'add cup' button on the bottom.
[1st modified]

I moved the position of 'add cup' button from bottom to top and coloured it with green. And I add a function that 'make a primary' in order to arrange the cup they usually use at the first page.
[2nd modified]


After I changed 'uploading photo' feature from optional to compulsory, and changed a means of rewards, I deleted the cup illustration. And I designed it with various type and asked people when I asked for feedback. And most voted one which is the final design.
[final]


I did not want to do the normal stamp design, so I experimented but it looked quite complex.


I wanted to give the design unity, so I coloured the part of the top with the title(?) with green. So I gave up the flicking motion :(
[final]

In order to explain the whole rewards, the texts were too long. And I thought people would feel bored if the explanation is too long and is shown on one page. So I divided it into 'my rewards' and 'how it works'.
And I added 'coupon' page and imposed the condition that the 3rd and 6th stamp need to be used in a day when coupon is issued. And 10th stamp will be saved for 60 days and people can use it any day they want. I was inspired by paper coupon because people can issue new paper coupon when they do not want to use. So I added coupon page.

5. Arrange and hide the cup list
[initial]
[final]

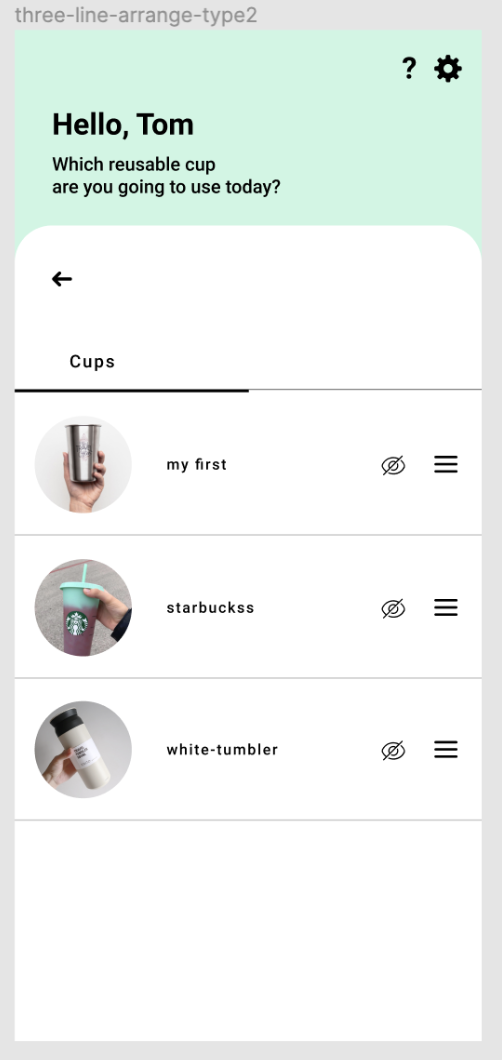
At first, the cup people can register was up to 3. If they want to add a new one, they needed to delete one. The reason I limited the number of cup is that the app encourages users not only to use reusable cups frequently but also to use cups that they already have rather than to buy more cups. However, if I am a user, I would feel proud of myself when the number of cup uses increase and when I check it. So I changed the condition of adding cup. There are still a limitation to register but they can add more cup when they use any cup over 50 times. But they can add only one more and they need to use another cup over 50 more if they want to add more.
If users keep using this app and add more cup, some people might want to hide the cup or delete. So I add 'hidden cup' and 'delete cup' function.
댓글
댓글 쓰기